I am slowly migrating my blog over to my new website! Please follow me there as this blog will soon be shut down.
My new URL is: http://www.christineiscrafting.com/
Thanks & have a great week!
Monday, June 27, 2016
Saturday, June 25, 2016
Pimpin' my Ikea Raskog cart!
Hello again! I'm quite the busy blogger today, posting all of the crafts I'm having fun creating on this beautiful (and hot) Houston Saturday.
I decided recently to change up my Ikea Raskog cart that I've been using in my craft room. It came in a rather plain but pretty vanilla color, but my craft room is white with touches of lime green, so I decided to pimp my cart and make it match my room!

It wasn't as difficult as I expected it to be, and unless you're the anal-retentive DIYer like I am, simply put it together and paint it already assembled. The way I did it, it took five coats of paint (three cans) to get the finish I desired.
Are you ready, here we go!
First, I disassembled the cart. Next, I placed all of the parts on a large piece of cardboard to protect the concrete (outside of course, the fumes and overspray from spray paint are awful).

Using four light coats, I sprayed each piece, each side, allowing each coat to completely dry. The key is LIGHT coats. Heavy coats end up running and dripping and looking kind of ucky.


I actually used a box to paint each of the three shelves, because they fit perfectly inside it and kept the overspray to a minimum.
Finally, I assembled the entire thing and gave it one more good coat. After that was dry, I added washi tape to the top of each basket to give it a look that complimented my craft room. The result was stunning, if I do say so myself.

I added an Ikea Bygel cup to the right to store adhesive taperunners, and I added an Ordning utensil caddy to the left with zip ties to hold taller things like my heavy duty scissors and rulers. Each shelf is a separate 'zone' so to speak and will be explained here:

The top of the cart holds my 4x6 and 6x6 paper. I use these quite frequently to mat photos, use for journal boxes, or too use for small punches or die cuts. In the front in the green Dollar Tree bins are some Project Life materials. I don't follow Project Life per se, but I love their small cards for journaling. When I see them on sale or clearance, I grab a few packs. They're great for journaling! (Note the washi tape around the top shelf -- matches my room perfectly).

The second level holds my boxes of punches, Becky Higgins sketches for inspiration when I'm stuck trying to decide how to lay out a scrapbook page, and a Dollar Tree bin of Wink of Stella markers. These markers are wonderful! They not only are markers, but they have glitter built into them, so your journaling or coloring gleams with glitter!

The bottom shelf holds my Texture Boutique embossing machine, and two Totally-Tiffany embossing folder clear plastic containers. I LOVE these clear organizers! They make it so easy to see my embossing folders (I store them alphabetically by my description not the name. I'd never find them by name because quite honestly, some of the names by the manufacturers are very strange lol).
So there's my cart! I pimped it out, I love it, and it works great in my craft room. I roll it where I need it then put it back. It holds everything I use every day in scrapbooking.

Until next time, happy crafting!
Decorative clothespins for hanging crafts or pages
Happy Saturday!
We just returned from our typical Saturday morning sporting event, where we sat and perspired in the humid Houston June heat. Now that we're all cooled down, I'm crafting!
I wanted to make a cute hanging line that I can use to hang paper projects I create in my craft room. It's good for inspiration, and it's also a great way to decorate your room. Often times, I create a wonderful, elaborate scrapbook page, only to put it away in an album, not to see it again for a while. I want to do something different: Create a page and keep it out for a while so I can get inspiration from it for other pages, and also enjoy the memories associated with the page. So today I decided to do something about it!
I bought a bag of 36 clothespins from Dollar Tree for $1, and three rolls of washi tape I got from Tuesday Morning for $.99 each.

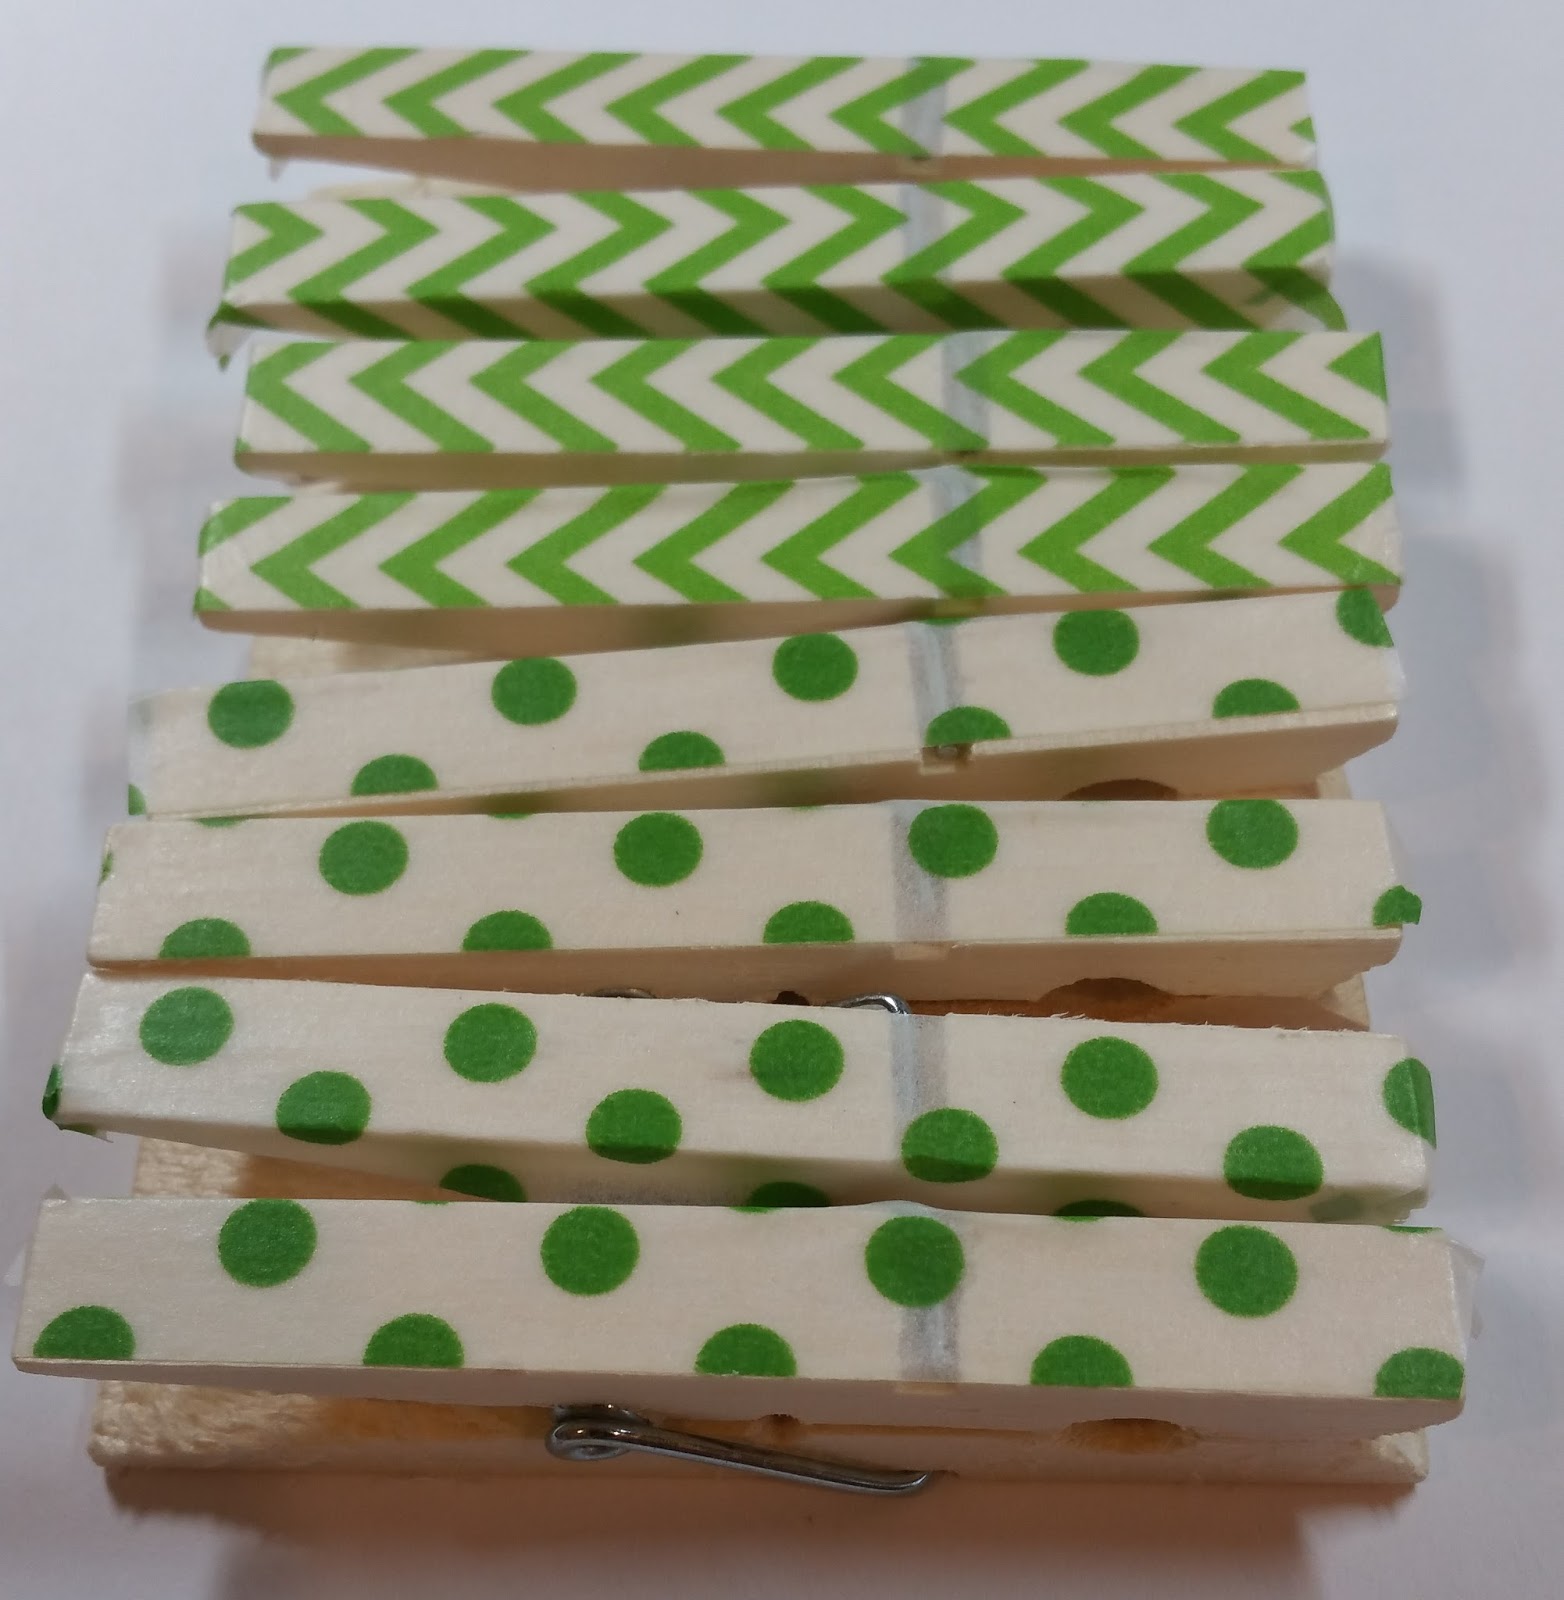
Next, I carefully placed a short piece of tape on a clothespin, making sure the end of the tape just reached the bottom of the clothespin. The top could be a little long. We'll deal with that in a second.

Cut any overhang as seen above. Cut at an angle, ending at the top corner of the clothespin. This makes it very easy to fold over and tuck under. Depending on the width of your tape, you may have some overhang on the side. That's okay! I simply tucked it under, and it looks great! Make sure your ends are securely taped down. You want your tape to stay in place.
I chose two patterns of tape, and in no time at all (about 5 minutes) made all 8 of my clothespins.
Now simply choose your favorite ribbon, string, or twine (as I used here), and space your clothespins out. Now you're ready to use as a hanger for embellishments, pictures, or display your creations, like I'm going to do! Simply thumbtack the two ends of your ribbon, and you're done! Cute, easy, and very inexpensive project. I was inspired by this when I saw decorated clothespins going for $9.99 and $12.99. I am way too frugal to spend that kind of money. I used tape I already had, twine I already had, and $1 worth of clothespins.
Happy Saturday & craft on!

Hi from my little home on the Texas Gulf Coast! I have been scrapbooking since the 1990s, first beginning with Creative Memories' systems. Oh, how simple those early days were! A triangle here, a square punched out there, a strip down the side with a few stickers...now I spend hours creating works of art! The pictures are important, but leaving a cherished memory behind for my family is as important to me.
I have recently created my very own craft room, and in an effort to be organized, have scoured thrift stores, dollar stores, and garage sales for items I can upcycle or repurpose for craft room storage and organization. Here's an old lazy Susan I bought at Good Will that I repainted and now use on my desk to hold tools and adhesives!


I hope to share my projects with you, and learn a little along the way.
Subscribe to:
Comments (Atom)